Monday, January 24, 2011

Ally's Tools & Essentials

I've been a fan of Allison Landy's for a while now. And her space is just SO cool! So many great ideas and awesome colors!

I asked Ally if she'd be willing to share some of her photos and ideas. I was so glad she agreed! :-)

From Ally:

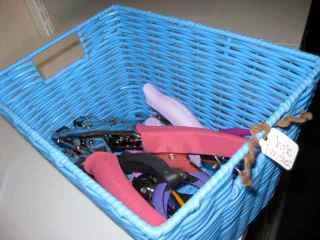
"My large punches are stored in this shallow basket on a shelf directly behind where I stand and scrap. Though my collection has grown a LOT since this photo was taken - so much that I've added a different way to store my border punches. I have a small tin tub next to this basket that holds my small punches."

"I also like using tall ceramic coffee mugs for random tools - here are my paintbrushes..."

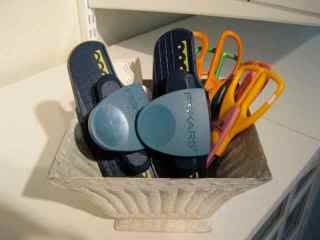
"I keep a lot of little things on these two IKEA shelves that sit right above my scrap table. The scissors hang from hooks and are right where I need them.

"The black jar to the right holds all my basic tools such as bone folder, Basic Grey sanding tools, styluses for rub ons, craft knife, etc. It actually sits on my desk now rather than on the shelf because I am in it so often I wanted it at counter height."

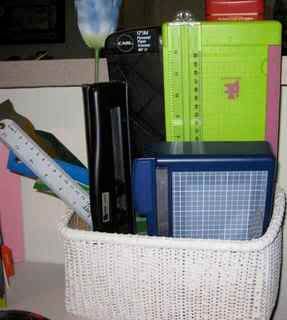
"Trimmers and adhesives are another item I need right at hand. My table is a counter height banquet table with 3 drawers and 2 shelves. The big adhesive gun and paper trimmer sit on the top shelf right under the table and right in front of where I stand.

"Rulers, small trimmers and small adhesives are all stored in the middle drawer, right above the others and right in front of where I stand. I guess I'm a lazy scrapper, because I'm all about convenience and usage when it comes to my organization and storage."

"Extra adhesives/specialty adhesives sit in a bin behind me..."


Thank you for sharing this with us, Ally! (And you can bet I'll be sharing more of her space in the future!)

Friday, January 21, 2011

Tools and Essentials - Part 2

  • If you only use three main adhesives on every layout and maybe two journaling pens, it's okay to keep those in one place or in your portable container, and then keep the rest of all your pens and refill adhesives in a closed container up on a shelf some place. I have a creamer cup that holds pens i use all the time, then other pens/markers up above [in a wine holder] on a shelf:

  • If you feel like you don't have enough space for your supplies and how you want to organize them, then think UP. Shelves above your workspace can create SO much more room. Once I installed shelving (elfa from The Container Store), I couldn't believe the extra space I created. Even if you have only one corner of a room, you can use shelves as high as your wall.
  • Underneath your work space (I'm a standing scrapper) or nearby, consider having a small basket that holds punches and/or other small tools you use often:

  • And then your deco scissors and/or border punches can be kept nearby as well:

  • I used to keep my punches (organized by shape... one container for circles, one for squares, and one for flowers/hearts/stars/etc) in these canvas bins from The Container Store. Those bins were in a row on the floor under my computer space, but still within reach. I used to have them in a closed box on a shelf, but because punches are heavy, it was more practical for me to store them down low.
  • Some people store punches in hanging shoe organizers. I do store my punches in a shoe organizer, but not how you would expect... LOL. I LOVE this method... works great for me! I have since covered each shelf with patterned paper... tee hee, but this is the "before" photo. ;-)

  • Punches.

  • I store my border punches (I only have about 6 or 7, so it works) in a vintage soda holder:

There are tons of great ideas out there! Please share what you do or what you find online for inspiration! This is one of the best discussion topics, I think!

TIP:

The Organized and Inspired Scrapbooker also suggests keeping tools hidden away in drawers or closed boxes or closets... because they are usually unsightly and can be an eye-sore to a "pretty" scrap space. I just wanted to mention this as well because not everyone organizes and stores things the same, and this may be an option you'd prefer.

Wednesday, January 19, 2011

Tools and Essentials - Part 1

Are you ready to dive into your tools and essentials?! This is a loooong one. Get out your notebook and take notes. You'll want that if you read something you may want to implement! :-)

TOOLS:

Punches

Heat Gun

Deco Scissors

Hole Punches (hand held or Crop-A-Dile)

Eyelet Setter

Circle/Shape Cutter

Die-Cut Machines and Accessories

ESSENTIALS:

Trimmers

Rulers

Everyday scissors

Craft Knife

Pens

Markers/Colored Pencils

Adhesives

(Feel free to add any others to your own list.)

I think tools are one of the most difficult things for people to purge and organize. Well, they are for me! I think the thing that helped me most... is really sitting down (or you know, standing up... whatever) to figure out:

  • HOW much I use them
  • WHERE in my scrap space I use them
  • WHEN (in my creative process) I use them
These questions helped me SO much went I went about organizing them.

I do know this about tools... the ones you use (or want to/like to use) ALL the time, should be at arm's reach, or you won't use them.

  1. So pretty much what I did... I got rid of all punches, shape cutters and deco scissors that I never use. If you keep these things thinking, "But what if I *DO* need this some day?!" you're going to just collect stuff you never use. Seriously, if you haven't used it in a year, get rid of it. Give it to a friend (or your kids or your garage...), and if you need it, just borrow it from them. And then if you need one down the road, and you feel like you're *constantly* saying, "I wish I had this!" then go buy it (and use a coupon ;-) ). It feels good to purge things you don't use. :) I promise... if you get rid of something you don't ever use, you won't miss it, and you'll forget you even had it! LOL.
  2. Also, tools... are a bit cumbersome. Some are fun to play with, but sometimes you're just in this crafting "groove," and the thought of taking the time to get the tools out and actually use them is more work than you want. And... you may feel like it's not worth the work, so you just skip the tool usage. (A practice I, myself, have adopted... LOL.)
  3. THIS is why I keep all my tools in OPEN storage containers, baskets or bins. (Tools don't have to have any fancy storage.) This way, I can reach over and grab something quickly. I don't have to pull something off a shelf, open a box, etc. My heat gun with embossing powders (which are rarely used) do sit on a top shelf, but they're also in an open container, so if I do need them, everything is RIGHT there.
  4. My Making Memories trimmer is RIGHT next to where I scrap. I keep my Creative Memories photo trimmer, my rulers, and a 3-hole punch all in arm's reach too... either on a shelf above or below my scrap table.
  5. You could also keep them altogether in a basket like I used to do here...

I used this system for two years, and it REALLY worked for me. Grab and go. I don't have to open a drawer or open a box, and I LOVE that. Tools already take long enough to use... I don't need that extra time needed to actually GET to them. LOL.

REMEMBER THAT. Tools you use all the time... should NOT take a while to get. One.Motion.

*******TIP:

The Organized and Inspired Scrapbooker suggests doing a layout or two (like... right now) to decide which tools you use ALL the time. My suggestion is that while you are working on a layout, keep a shoebox (or container that size) on your table or down on the floor at your feet. As you use tools, throw them in that box while you're not using them. Then at the end of your creating process, look at what's in that box. What did you use? What did you use the most? And think about keeping all those things together from now on.

Simple Scrapbooks (may it rest in peace...) magazine's "Basic Tool Kit" includes:

portable paper trimmer

small scissors (I use Cutter Bee non-stick)

black archival journaling pen (I use Copic and/or AC... blows ZIG out of the water imo)

pencil (I use an archival safe one from Creative Memories)

pencil sharpener

art gum eraser

paper adhesive (umm... lots. tee hee)

photo adhesive

portable container to hold above tools (try these Stockholm boxes)


To be continued...


Sunday, January 16, 2011

Paper Scraps!

If you keep your scraps, you may want to have a solution for them!

Here is my cardstock and scraps storage...

Smaller "paper pouches" inside the respective cardstock color holder...

Works GREAT for me. I know a lot of people use these too...

(Umm... that would be too small for me. LOL. I must keep too many scraps on hand... LOL. BUT I use them A LOT... WAY more than I use full sheets. And now that I think about it, it may be a good idea to have something small like this. It will force you to use them or lose them because you just don't have the space! ;-) )

You can also keep scraps in an accordion file. (If you're short on space, you can store ALL your paper in these!)

Or maybe an Iris box if you like to "dig"! Smile 
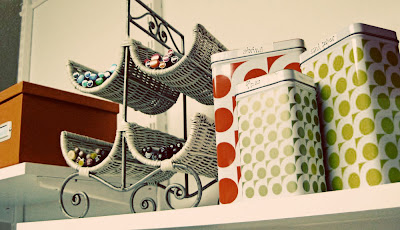
This works great for some people because they're all in one place... and contained!

p.s. I store kits, collections and themes in these Craft Keepers. And if I have scraps for a collection or kit, I put them in one of these 4x6 acid free bags...
and then *that* little bag (unsealed) goes in the larger envelope, so it's all contained. Smile I really like how this system works for me...

Do you keep scraps? If so, how do you store them?

Saturday, January 15, 2011

Storing Paper!

Figure out what works for you... storing your paper horizontally or vertically.

I used to store mine horizontally, using this cube method.

It worked for me for a while, but I determined I much preferred storing it vertically. Find what works best for you!

If you want to store vertically, they are several options. This easy access version is fun. Here is a photo of my cardstock storage, using these...

I think I have like 20 now. LOL. Both cardstock and patterned paper go in them.

This Rolling Cart is helpful if you're going to store full kits/collections or make your own kits...

This one from Target is neat... and could work if you buy lots. Wink (Photo comes from YoungHouseLove.com) I have one similar (that has since been discontinued), but mine has 6 shelves. I use it for "in progress" pages. Jo-Ann also sells one similar.

If you've ever been to a brick & mortar scrapbook store, you've seen these...

I've seen quite a few people with them in their own rooms at home though!

And I like to house my paper collections (say, you buy a whole line or collection like this) and kits in their own Craft Keeper envelope. Then *these* envelopes go in the Cropper Hopper Holders!

There are TONS of ways to store your paper! Just figure out what works best for you. And in the coming months, I'm sure I'll have MANY more photos of how people store their paper!

Friday, January 14, 2011

Organizing Paper!

HOORAY FOR PAPER!

A few months ago, I took out ALL my patterned paper (and Studio Calico kits...) and placed everything on the floor. Okay, I kept it *mostly* contained (in crop bags and Cropper Hoppers), but while I was going through it, it was EVERYWHERE...


And that's okay. It REALLY helps when you're organizing to take EVERYTHING from its place and stick it, temporarily, in a box or different container... or strewn about if you have the room. Tee hee. ;-)

I even broke up some kits. My favorites, or ones I hadn't touched much, stayed in tact. But I wanted to go through, LOOK at everything I had, and PURGE too. I went through Basic Grey collections and found several pieces that I just didn't like. Even though I had full lines, I ditched the ones I knew I wouldn't use.

Helpful Hint:

If you're on the fence about a certain sheet of paper, come up with THREE ways you can use it. Write it on a post-it or sheet of paper and stick it on the back, so if you do come back to that sheet of paper, you'll have a jumping-off point for inspiration!

Just get rid of stuff. Really. You will never use all that paper. Okay, probably never. ;-)

Mmm... feels good. Smile

Organizing:

Cardstock organization is usually a given for most people: store by color. Patterned paper, though... you can organize lots of ways!

  • Manufacturer (alphabetically or store by which ones you use most often)
  • Color
  • Theme (I have tabs for Floral, Ledger, Woodgrain, Christmas, etc)
  • Season (may be helpful if you scrap chronologically)
  • Make your own kits (and perhaps take photos, so you can find something if you need to)
Do you have any other ways you've tried that works for you?

Tuesday, January 11, 2011

A Dedicated Piece of Furniture?

Even with no dedicated scrapping space, you can find lots of pieces of furniture out there that can act as scrappy storage! This is a great option if you don't already have room in a cupboard or closet. If you *do* happen to have a free space about 3-4 ft wide, these would be great alternatives to just a cabinet!

Any armoire could work. They've always got great shelves... and some have drawers! This one from Ikea is a great choice.

If you want to scrap in your dining room or kitchen, you can use a buffet table to store your stash! Cute little baskets would look great on the bottom shelf! And you can always use baskets, bins, crates or cake stands on top to hold scrappy goodies! This one from JC Penney is even on sale! ;-)

I once used a secretary desk to house my scrappy stuff. Mine isn't as fancy as this (mine is more like this), but it still worked great! (I now use it in our entryway. It holds receipts, keys, dog leashes, umbrellas, etc.) This one from Overstock.com can house lots of your stuff, and it looks all neat and tidy when closed up!

The awesome thing about these options is that you can just close them up to hide your scrappy stuff! Even if you're in the middle of a project, you can just close the doors or shut a drawer, so it looks all neat and tidy. :-) You wouldn't even be able to tell they housed a scrappy mess! ;-)

Wednesday, January 5, 2011

No Dedicated Scrap Space?

If you don't have a dedicated scrap room, you can make it work in ANY space in your home! There are tons of solutions out there!
You can even buy a rolling cart (like this one by Fiskars...)
... or this Legal-Sized one or this one (without the wrapping paper add-on)...
and use it ANYWHERE in your home!
may also be a great idea if you scrap in your living room or other common area. (Since it's on sale and backordered, it may very well be discontinued, but you can check your local store or Google for one similar.)
Storage chests (I found ours, made out of basket material, for like $30 at Ross or TJ Maxx) or trunks...
are also a great place to house your stuff in a living room, den or bedroom! You can put stackable baskets...
inside to make it easier to find things and store things.
Perhaps you want to craft on the kitchen table... Maybe clear out a cabinet or a shelf in the pantry.... so you can have a dedicated place *right there where you'll be scrapping* for your scrap stuff. Move un-used stuff to high shelves or a labeled box in the garage. Get rid of multiple items you probably don't need. Find cheap, plastic baskets/containers at Walmart or The Container Store...
to consolidate food or other kitchen items to make more room for your scrap stuff.
Even in a coat closet or linen closet (or any empty shelf, really), you can store your items in these bins...
or these handled baskets...
No matter where you choose to scrap in your home, you can always find a solution for your stash!