Showing posts with label storage. Show all posts

Friday, April 15, 2011

Labeling in Your Scrap Room.

I didn't used to label everything. I felt like I knew where everything was, where everything belonged.

Then I got smart. LOL.

Now I label *everything*. Even if I know where something is, I've realized that when I have labels, I get to it faster, and it just looks pretty. ;-) (Not just in my scrap room, but other places in my home too. The pantry, the fridge (!!! LOL), the linen closet, the laundry room, the master closet, etc.) But here are some of my favorite labeling places in my scrap room.

My blue baskets... I got a whole box of little white tags (from Staples or any office supply store), and I removed their white strings and just tied some red gingham on them. (This blue basket no longer holds these 6x6 pads, but I still have the same labeling in effect.)

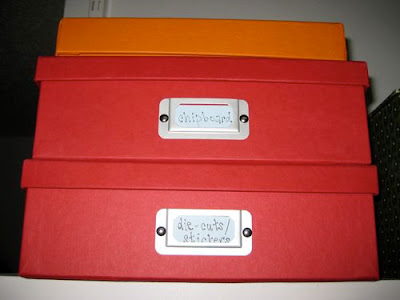
These red and orange boxes. I have SOOO many of these (in three colors) all over my scrap room. I use the SAME blue cardstock for each label to give them a bit of unity (plus my own handwriting... tee hee).
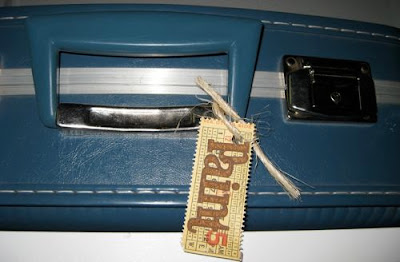
My blue vintage suitcase that holds my paint? It totally needed a cute label, so I used an SEI ticket, some twine and some alpha stickers.
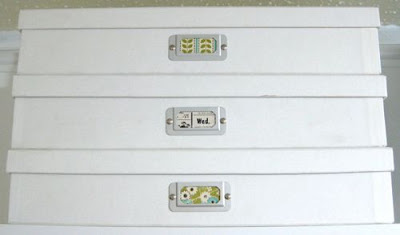
Okay, I lied. Not ALL the Container Store boxes have blue tags. LOL. I thought it would be fun to put some of my favorite patterned papers (these are October Afternoon). The two colored ones are memorabilia, and the one with a newspaper-looking label? It holds newspaper clippings of family members and memorable events. You could also use this method for holding colored papers and such. No actual "title" or "label," but just the "color" of what's in there.
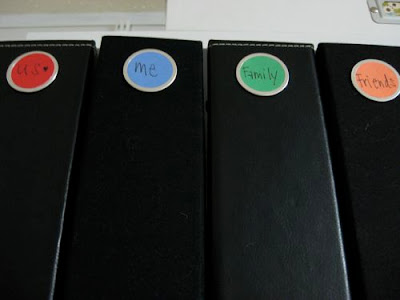
My scrapbook albums have SUPER quick and easy labeling. These are those rimmed tags you can get in a box at the office supply store. I just used a punch to punch out circles from cardstock and write the title. They're stuck on with glue dots. See? Easy and fast. :-)
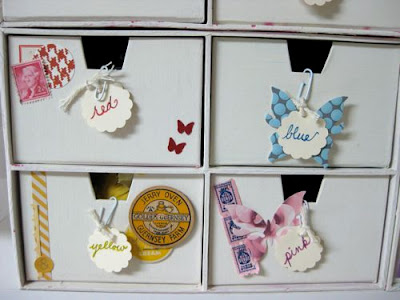
*Sometimes,* I like to get all crazy crafty with my labeling. ;-) These labels were just punched, and then I used paper clips and twine to attach to the drawers. This idea is loosely based off of Stacy Julian's method of how she labels her albums.

They are my embellishments by color, so I also added some of my favorite coordinating-color embellishments.
I thought long and hard (heeee ;-) ) about how I would label my photo drawers. I wanted something... umm... not boring? LOL. I got these vintage (from Kentucky!) mini-postcards from a long ago Studio Calico kit. I cut them to size to fit in each of the four drawers' book plates. I just added mini stickers for the titles.
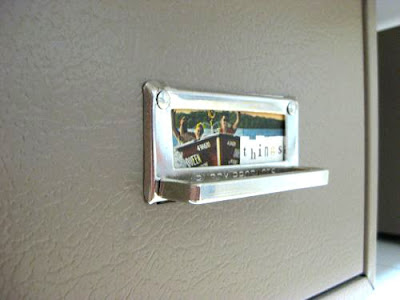
One of my favorite storage items in my scrap room are these canvas bins. I'm kinda obsessed with these. I'm not even kidding. I have EIGHT in my scrap room (I will add two more at the end of this year, I think... LOL). I also have them in our linen closet (for sheets, pillowcases, first aid stuff, dog stuff, etc), guest bathroom (towels), and they WILL go ;-) in the baby's room (in lieu of drawers).
The labels? Are Sassafras linen cards! I don't even have to trim them (YES!!!!!)... they fit *perfectly* in that little label pocket! Then I use mini alpha stickers (all in black to keep it unified) to identify the contents. :-) Here's a close-up:

And those are just some of the fun ways I use labels in my scrap room. I *do* own a label maker, but I only used that to label my Cropper Hopper folders.

So have you gotten creative with your labeling? I'd love to hear some of your ideas! :-D

Monday, January 24, 2011

Ally's Tools & Essentials

I've been a fan of Allison Landy's for a while now. And her space is just SO cool! So many great ideas and awesome colors!

I asked Ally if she'd be willing to share some of her photos and ideas. I was so glad she agreed! :-)

From Ally:

"My large punches are stored in this shallow basket on a shelf directly behind where I stand and scrap. Though my collection has grown a LOT since this photo was taken - so much that I've added a different way to store my border punches. I have a small tin tub next to this basket that holds my small punches."

"I also like using tall ceramic coffee mugs for random tools - here are my paintbrushes..."

"I keep a lot of little things on these two IKEA shelves that sit right above my scrap table. The scissors hang from hooks and are right where I need them.

"The black jar to the right holds all my basic tools such as bone folder, Basic Grey sanding tools, styluses for rub ons, craft knife, etc. It actually sits on my desk now rather than on the shelf because I am in it so often I wanted it at counter height."

"Trimmers and adhesives are another item I need right at hand. My table is a counter height banquet table with 3 drawers and 2 shelves. The big adhesive gun and paper trimmer sit on the top shelf right under the table and right in front of where I stand.

"Rulers, small trimmers and small adhesives are all stored in the middle drawer, right above the others and right in front of where I stand. I guess I'm a lazy scrapper, because I'm all about convenience and usage when it comes to my organization and storage."

"Extra adhesives/specialty adhesives sit in a bin behind me..."


Thank you for sharing this with us, Ally! (And you can bet I'll be sharing more of her space in the future!)

Sunday, January 16, 2011

Paper Scraps!

If you keep your scraps, you may want to have a solution for them!

Here is my cardstock and scraps storage...

Smaller "paper pouches" inside the respective cardstock color holder...

Works GREAT for me. I know a lot of people use these too...

(Umm... that would be too small for me. LOL. I must keep too many scraps on hand... LOL. BUT I use them A LOT... WAY more than I use full sheets. And now that I think about it, it may be a good idea to have something small like this. It will force you to use them or lose them because you just don't have the space! ;-) )

You can also keep scraps in an accordion file. (If you're short on space, you can store ALL your paper in these!)

Or maybe an Iris box if you like to "dig"! Smile This works great for some people because they're all in one place... and contained!
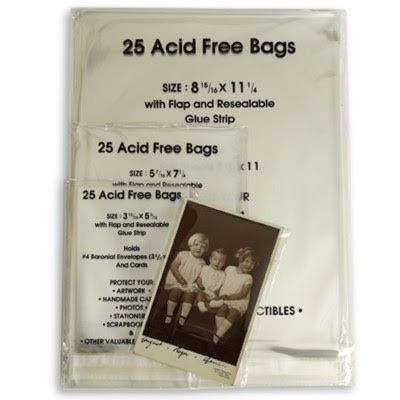
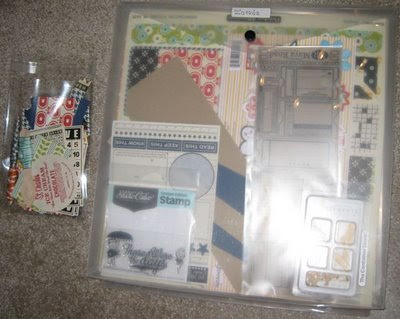
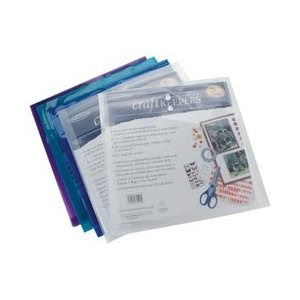
p.s. I store kits, collections and themes in these Craft Keepers. And if I have scraps for a collection or kit, I put them in one of these 4x6 acid free bags...
and then *that* little bag (unsealed) goes in the larger envelope, so it's all contained. Smile I really like how this system works for me...

Do you keep scraps? If so, how do you store them?

Saturday, January 15, 2011

Storing Paper!

Figure out what works for you... storing your paper horizontally or vertically.

I used to store mine horizontally, using this cube method.

It worked for me for a while, but I determined I much preferred storing it vertically. Find what works best for you!

If you want to store vertically, they are several options. This easy access version is fun. Here is a photo of my cardstock storage, using these...

I think I have like 20 now. LOL. Both cardstock and patterned paper go in them.

This Rolling Cart is helpful if you're going to store full kits/collections or make your own kits...

This one from Target is neat... and could work if you buy lots. Wink (Photo comes from YoungHouseLove.com) I have one similar (that has since been discontinued), but mine has 6 shelves. I use it for "in progress" pages. Jo-Ann also sells one similar.

If you've ever been to a brick & mortar scrapbook store, you've seen these...

I've seen quite a few people with them in their own rooms at home though!

And I like to house my paper collections (say, you buy a whole line or collection like this) and kits in their own Craft Keeper envelope. Then *these* envelopes go in the Cropper Hopper Holders!

There are TONS of ways to store your paper! Just figure out what works best for you. And in the coming months, I'm sure I'll have MANY more photos of how people store their paper!

Tuesday, January 11, 2011

A Dedicated Piece of Furniture?

Even with no dedicated scrapping space, you can find lots of pieces of furniture out there that can act as scrappy storage! This is a great option if you don't already have room in a cupboard or closet. If you *do* happen to have a free space about 3-4 ft wide, these would be great alternatives to just a cabinet!

Any armoire could work. They've always got great shelves... and some have drawers! This one from Ikea is a great choice.

If you want to scrap in your dining room or kitchen, you can use a buffet table to store your stash! Cute little baskets would look great on the bottom shelf! And you can always use baskets, bins, crates or cake stands on top to hold scrappy goodies! This one from JC Penney is even on sale! ;-)

I once used a secretary desk to house my scrappy stuff. Mine isn't as fancy as this (mine is more like this), but it still worked great! (I now use it in our entryway. It holds receipts, keys, dog leashes, umbrellas, etc.) This one from Overstock.com can house lots of your stuff, and it looks all neat and tidy when closed up!

The awesome thing about these options is that you can just close them up to hide your scrappy stuff! Even if you're in the middle of a project, you can just close the doors or shut a drawer, so it looks all neat and tidy. :-) You wouldn't even be able to tell they housed a scrappy mess! ;-)

Wednesday, January 5, 2011

No Dedicated Scrap Space?

If you don't have a dedicated scrap room, you can make it work in ANY space in your home! There are tons of solutions out there!
You can even buy a rolling cart (like this one by Fiskars...)
... or this Legal-Sized one or this one (without the wrapping paper add-on)...
and use it ANYWHERE in your home!
may also be a great idea if you scrap in your living room or other common area. (Since it's on sale and backordered, it may very well be discontinued, but you can check your local store or Google for one similar.)
Storage chests (I found ours, made out of basket material, for like $30 at Ross or TJ Maxx) or trunks...
are also a great place to house your stuff in a living room, den or bedroom! You can put stackable baskets...
inside to make it easier to find things and store things.
Perhaps you want to craft on the kitchen table... Maybe clear out a cabinet or a shelf in the pantry.... so you can have a dedicated place *right there where you'll be scrapping* for your scrap stuff. Move un-used stuff to high shelves or a labeled box in the garage. Get rid of multiple items you probably don't need. Find cheap, plastic baskets/containers at Walmart or The Container Store...
to consolidate food or other kitchen items to make more room for your scrap stuff.
Even in a coat closet or linen closet (or any empty shelf, really), you can store your items in these bins...
or these handled baskets...
No matter where you choose to scrap in your home, you can always find a solution for your stash!